What to Measure Before Buying a Golf Simulator in 2026
A golf simulator is won or lost before the product is added to cart. Ceiling height, swing clearance, enclosure depth, launch monitor placement and projector throw all need to work together.
Golf simulator demand keeps growing because more players want year-round practice, indoor entertainment and data-led training without waiting for perfect weather or tee times. National Golf Foundation research shows simulator and screen golf participation has more than doubled since 2019, while 2026 market reports continue to point to strong growth in home and commercial simulator setups.
That growth has made the category more accessible, but it has also created more ways to buy the wrong thing. A launch monitor, mat, enclosure and projector may all be good products individually, yet still fail as a room. This guide explains what to measure before browsing the Golf Simulators collection, Pro Golf Enclosures or the Launch Monitors page.

Ceiling height is the first yes-or-no check
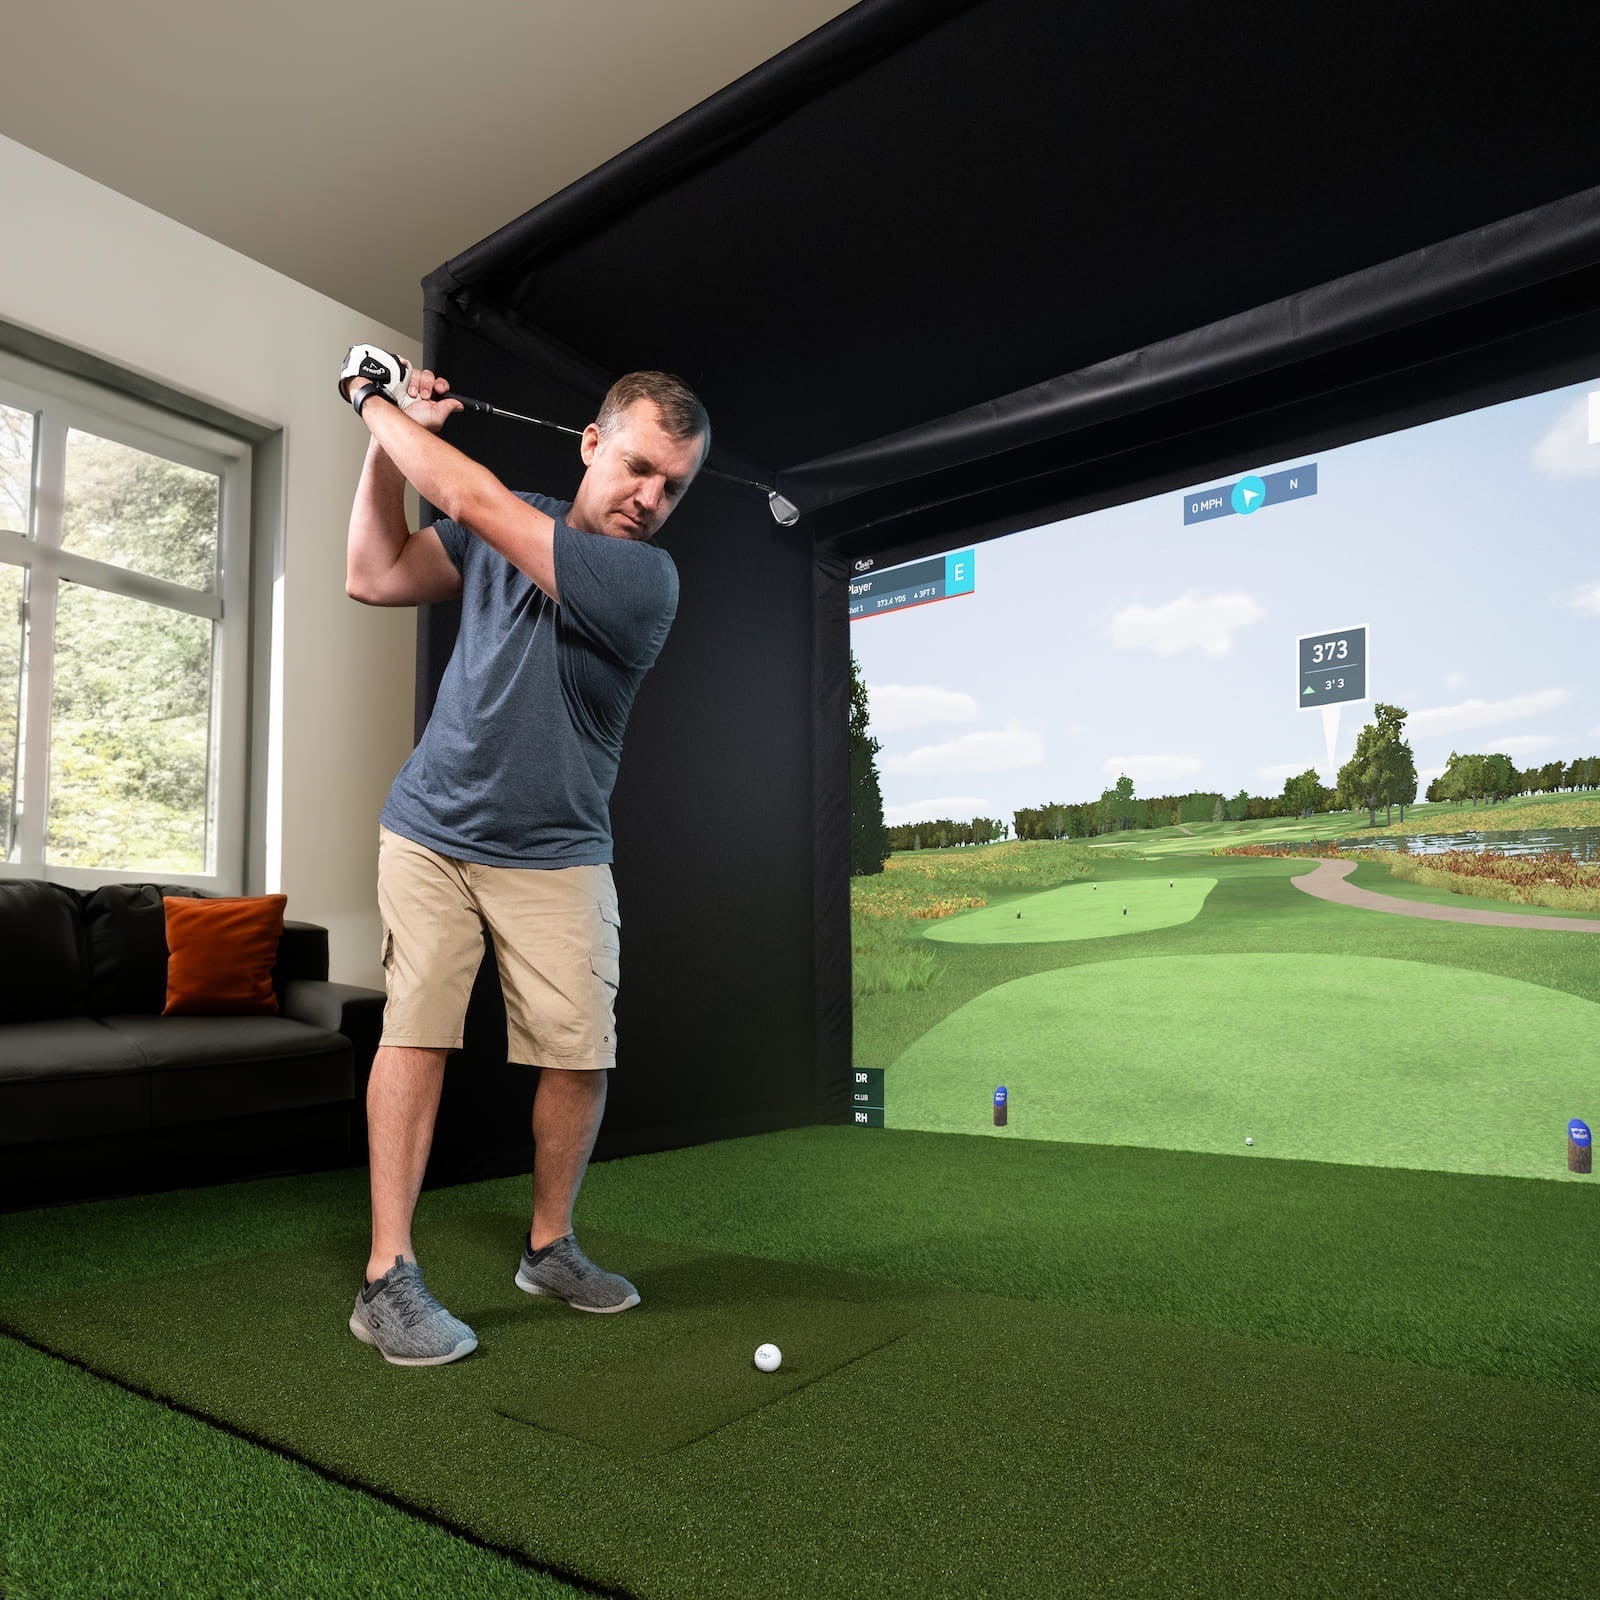
Golf has a simple physical constraint: the player must be able to swing comfortably. Ceiling height is the first measurement because it decides whether the room can work at all. The correct height depends on player height, club length, swing plane and confidence. Some players can swing shorter clubs in lower rooms, but a true simulator bay should not force a restricted swing. If the golfer feels nervous about hitting the ceiling, the simulator will not feel natural.
Measure from the finished floor to the lowest point of the ceiling. Include beams, light fittings, garage door tracks, ceiling fans and anything else that reduces usable height. Then test the swing with the longest club the player expects to use. A tape measure alone is not enough. The player’s real motion is the test.
If the room is close, do not assume a premium launch monitor will solve it. Data quality is useful, but it cannot fix a cramped swing. In tight spaces, a hitting mat and net may still provide practice value, but a full simulator bay should be planned honestly.
Width decides comfort and left-right usability
Width is about more than the screen. The player needs room to stand, swing and align. A right-handed player may fit differently from a left-handed player. If both left- and right-handed golfers will use the simulator, the bay needs to be planned around the centerline and launch monitor position. Some launch monitors sit beside the ball; others sit behind or above the hitting area. That affects how easily the bay can support both orientations.
Measure wall to wall, then subtract anything that cannot move. Storage cabinets, shelves, support columns and garage items all reduce usable width. Also consider whether the enclosure itself has side barriers, curtains or frame pieces that need clearance. A bay that technically fits may still feel narrow if the player is too close to side netting.
The Pro Golf Simulator Enclosure Kit with Impact Screen is the type of product that should be selected after the room width is understood. The enclosure is not only a screen; it defines the shape and safety of the bay.
Depth is where many rooms get caught
Depth controls screen distance, ball flight, launch monitor placement, projector placement and safe follow-through. A golfer needs space between the ball and the screen so impact feels safe. Some launch monitors need room behind the ball. A projector may need throw distance or a short-throw position. The player also needs space behind the stance for the backswing and body movement.
Start by measuring from the intended screen wall to the back of the usable room. Then break that into zones: screen and enclosure depth, ball-to-screen distance, hitting area, launch monitor zone, player movement and walkway. If the simulator shares space with a garage or home gym, remember that stored items can creep into the swing zone over time.
Depth is also important for projector shadows. A projector mounted in the wrong place can cast the player’s shadow onto the impact screen. Short-throw projectors help, but they still need planning. Products such as the BenQ short-throw golf simulator projector should be matched to room depth, screen size and mounting position rather than chosen after the enclosure arrives.
The hitting position is the center of the room
The hitting position controls everything else. Mark where the ball will sit, then work outward. From that point, check ceiling height through the backswing and follow-through, side clearance, distance to the screen and distance to any launch monitor. This is the most useful way to plan because the golfer experiences the room from the ball position, not from the wall.
The hitting mat also needs to feel stable and properly sized. A product such as the Country Club Elite Golf Hitting Mat should be placed so stance, ball position and launch monitor alignment all work together. Do not treat the mat as an afterthought. It is the surface the golfer will use every time.

Launch monitor placement changes the room plan
Launch monitors are not interchangeable from a room-planning perspective. Some radar-based systems work best with space behind the ball and enough ball flight. Camera-based systems may sit beside the hitting area. Overhead systems need ceiling structure and mounting. Each approach changes the bay layout, left-right usability and how permanent the installation feels.
That is why a launch monitor should be chosen with the room, not separately from it. A portable unit can be excellent for a flexible home setup. A higher-end system may be better for a dedicated bay or commercial space. A monitor that requires more space than the room can provide will create frustration, even if it has excellent data.
ElitePlay’s live launch monitor products include options such as Mevo+, Mevo Gen2 and FlightScope X3C. Compare them through the lens of the room: where will the unit sit, what data matters, and how permanent should the bay be?
Screen size and image size are not the same thing
A bigger screen can feel more immersive, but it also changes cost, enclosure size, projector requirements and room fit. The screen should suit the room and the golfer, not simply fill the largest wall. If the image is too small, the simulator may feel underwhelming. If it is too large for the room, the enclosure may feel cramped and the projector may become harder to place.
Think of the impact screen as part of a system. The enclosure frame, side protection, projector, image ratio and hitting position all work together. If the buyer wants a cinematic experience, they should plan image size earlier. If the priority is compact practice, a smaller enclosure may be more sensible.
That is why the Pro Golf Enclosures page exists as a separate planning route. The enclosure is the structure of the bay. Once it is chosen correctly, the rest of the golf system becomes easier to specify.
Projector throw, brightness and mounting
Projectors are often chosen too late. In a golf simulator, the projector has to create a bright, sharp image while avoiding player shadows and surviving the realities of an impact environment. Short-throw and laser projectors are popular because they can sit closer to the screen and reduce shadow problems, but each model still has throw-ratio requirements.
Measure the desired image width, then check where the projector would need to sit. Confirm whether it can be ceiling mounted, protected and powered. Think about ambient light, especially in garages and multi-use rooms. A bright projector helps, but controlling light still matters.
For a dedicated bay, a product such as the BenQ LK830ST 4K Short-Throw Laser Golf Simulator Projector should be considered alongside screen size and room depth, not after the enclosure has already been installed.
Commercial rooms need a different measurement mindset
A home golf simulator can be optimized around one or two players. A commercial bay has to handle repeated use, different body sizes, left- and right-handed players, bag storage, staff access, cleaning, queueing and customer comfort. It also needs to photograph well and feel easy for first-time users. That means the room around the bay matters almost as much as the bay itself.
If the project is commercial, start with the Commercial Simulator Solutions page rather than only product pages. A venue may need multiple bays, different privacy levels, reception flow, booking systems and clear installation planning. The right hardware is only one part of the decision.
A measurement checklist before you buy
- Finished ceiling height at the lowest point.
- Comfortable swing clearance with the longest club.
- Usable room width after cabinets, columns and storage are deducted.
- Total room depth from screen wall to back of usable space.
- Ball-to-screen distance and player stance position.
- Launch monitor placement and required distance.
- Projector mounting point, throw distance and power access.
- Left-handed and right-handed usability if more than one golfer will use the bay.
- Walkway, seating, storage and access around the hitting area.
- Lighting, window glare and ambient brightness.
The best golf simulator starts with a room plan
Golf simulator buyers often want a product recommendation first. A better process is to confirm the room, then choose products. The right room plan makes the launch monitor, enclosure, mat and projector feel like one system. The wrong plan turns even good components into compromises.
If you already have measurements, use Find My Simulator or send the dimensions through Contact. If you are still exploring, browse Golf Simulators, Launch Monitors and Pro Golf Enclosures to understand the component categories before making the final call.
How to use this guide before you ask for a quote
The easiest way to turn this advice into a useful recommendation is to collect the practical details before asking for help. For a home setup, take photos of the room from two angles, write down the usable width, depth and ceiling height, and note whether the simulator needs to share the room with furniture, storage or daily work. For a commercial setup, add the business goal, expected number of users, preferred session length and whether staff will operate the system. Those details let ElitePlay narrow the answer quickly instead of asking you to decode every product specification.
Budget is useful too, but it should be shared as a working range rather than a hard guess. A serious simulator can often be built in stages: frame and core controls first, then display, PC, motion or room improvements later. If the store knows the end goal, it can recommend a first step that will not block the later upgrade. This is especially important for racing motion, golf bays and commercial projects because the expensive mistake is not always buying too little. Sometimes it is buying a component that cannot grow with the rest of the room.
Also decide who the simulator is really for. A single enthusiast, a family room, a training environment and a venue do not need the same answer. A single user can tolerate a more tailored cockpit position. A family needs adjustment. A venue needs durability and reset speed. A training room needs repeatability and clarity. Once the user is defined, the product path becomes easier to judge.
Common mistakes to avoid
- Buying the headline product before confirming the room measurements.
- Treating the screen, cockpit, mat, launch monitor or motion platform as separate decisions instead of one environment.
- Choosing the highest specification without checking whether the user will feel the benefit.
- Forgetting power, cable routing, ventilation, access and maintenance space.
- Ignoring who else will use the simulator and how quickly it needs to adjust.
- Assuming commercial projects are just larger home builds.
- Leaving installation planning until after the hardware has already been chosen.
A good simulator purchase should feel considered rather than rushed. If a product page answers the whole question, use it. If the category page gives enough direction, start there. If the project still has unknowns, use the guided route or contact form. The goal is not to make the most complicated setup possible. The goal is to build a simulator that fits the room, feels right to use and has a sensible path for future upgrades.
Keep the final decision practical: write down the one thing the simulator must do best, then the two things that would be nice to add later. That small priority list keeps the buying process focused and helps prevent a setup that looks impressive on paper but misses the way it will actually be used.
How to compare two good options
Once the shortlist is down to two or three good choices, stop comparing every specification equally. Pick the criteria that will actually change the experience. For a racing build, that may be cockpit rigidity, pedal position, motion readiness and display plan. For a golf bay, it may be swing clearance, launch monitor placement, enclosure size and projector position. For a flight or commercial setup, it may be control layout, user workflow, durability and support. A spec only matters if the user will feel it or the room requires it.
Price should be compared as a system cost, not just a product cost. A lower-priced item can become the expensive route if it needs extra brackets, replacement controls, a different screen, a stronger frame or a later rebuild. A higher-priced package can be better value when it reduces compatibility risk and moves the buyer closer to the complete experience. This is why ElitePlay’s guided pages, category pages and quote routes all matter: they help the shopper compare the full setup rather than a single line item.
Also compare the amount of decision-making each route leaves open. Some buyers enjoy choosing every component. Others want a confident recommendation. Neither buyer is wrong. The best route is the one that matches how much control the customer wants over the build. A hobbyist may prefer component-level decisions; a commercial buyer or busy homeowner may prefer a clearer package or a managed quote.
When to stop researching and ask for help
Research is useful until it starts repeating itself. If the same questions keep coming back — will this fit, will these parts work together, is motion worth it, should this be custom, what happens if I upgrade later — that is usually the point where a guided recommendation is more valuable than another comparison tab. Simulator setups have too many room-specific variables for every answer to be solved by reading.
The best message to send is simple: the room dimensions, a photo or two, the main goal, the rough budget, the products already being considered and any must-have features. With that context, ElitePlay can steer the buyer toward a product, a collection, the finder route or a custom quote. That saves time and lowers the chance of buying something that is technically impressive but wrong for the space.
This is also where a specialist store is most useful. A marketplace can show hundreds of parts, but it cannot easily explain which parts belong together for a real room. A guided simulator store should reduce the number of decisions the customer has to make alone and make the next step feel obvious.
Next step
If you are comparing options now, start with Find My Simulator or send your room, goals and budget through the contact page. ElitePlay can help you decide whether a listed product, a guided collection route or a custom quote makes more sense.
Sources and market context
This guide was written in June 2026 and shaped around current simulator, golf and aviation market signals, plus the products and pages available on ElitePlay Simulators.