How to Build a Home Flight Simulator Cockpit in 2026: Controls, Displays and Training Goals
A good home flight simulator cockpit starts with the type of flying you want to practice. Controls, avionics, screen layout and room planning should follow the goal, not the other way around.

Start with the flying goal
Flight simulators can mean very different things. One buyer wants a realistic general aviation cockpit for procedures and practice. Another wants a premium enthusiast setup for Microsoft Flight Simulator-style exploration. A third wants a commercial or training-adjacent environment. Those goals should not be pushed through the same hardware decision.
ElitePlay’s Flight Simulators collection includes cockpit-oriented products for buyers who want more than a keyboard and monitor. The right starting point is to decide whether the simulator is for entertainment, familiarization, procedural practice, training support or a commercial experience. That goal shapes every control and display decision.
Understand the training language before making claims
Flight simulation is surrounded by specific training language. FAA-approved devices, basic aviation training devices, advanced aviation training devices and full-flight simulators are not interchangeable labels. A home cockpit can be highly useful without being an approved training device. A commercial buyer should be especially careful to describe the simulator accurately.
That does not reduce the value of a home or commercial cockpit. It simply means the purpose should be clear. A simulator can help a pilot rehearse flows, build familiarity, practice scanning, learn avionics logic and stay mentally connected between lessons. But if the buyer needs logged credit or approved training use, that requirement must be handled separately and explicitly.
Choose the aircraft style before the parts list
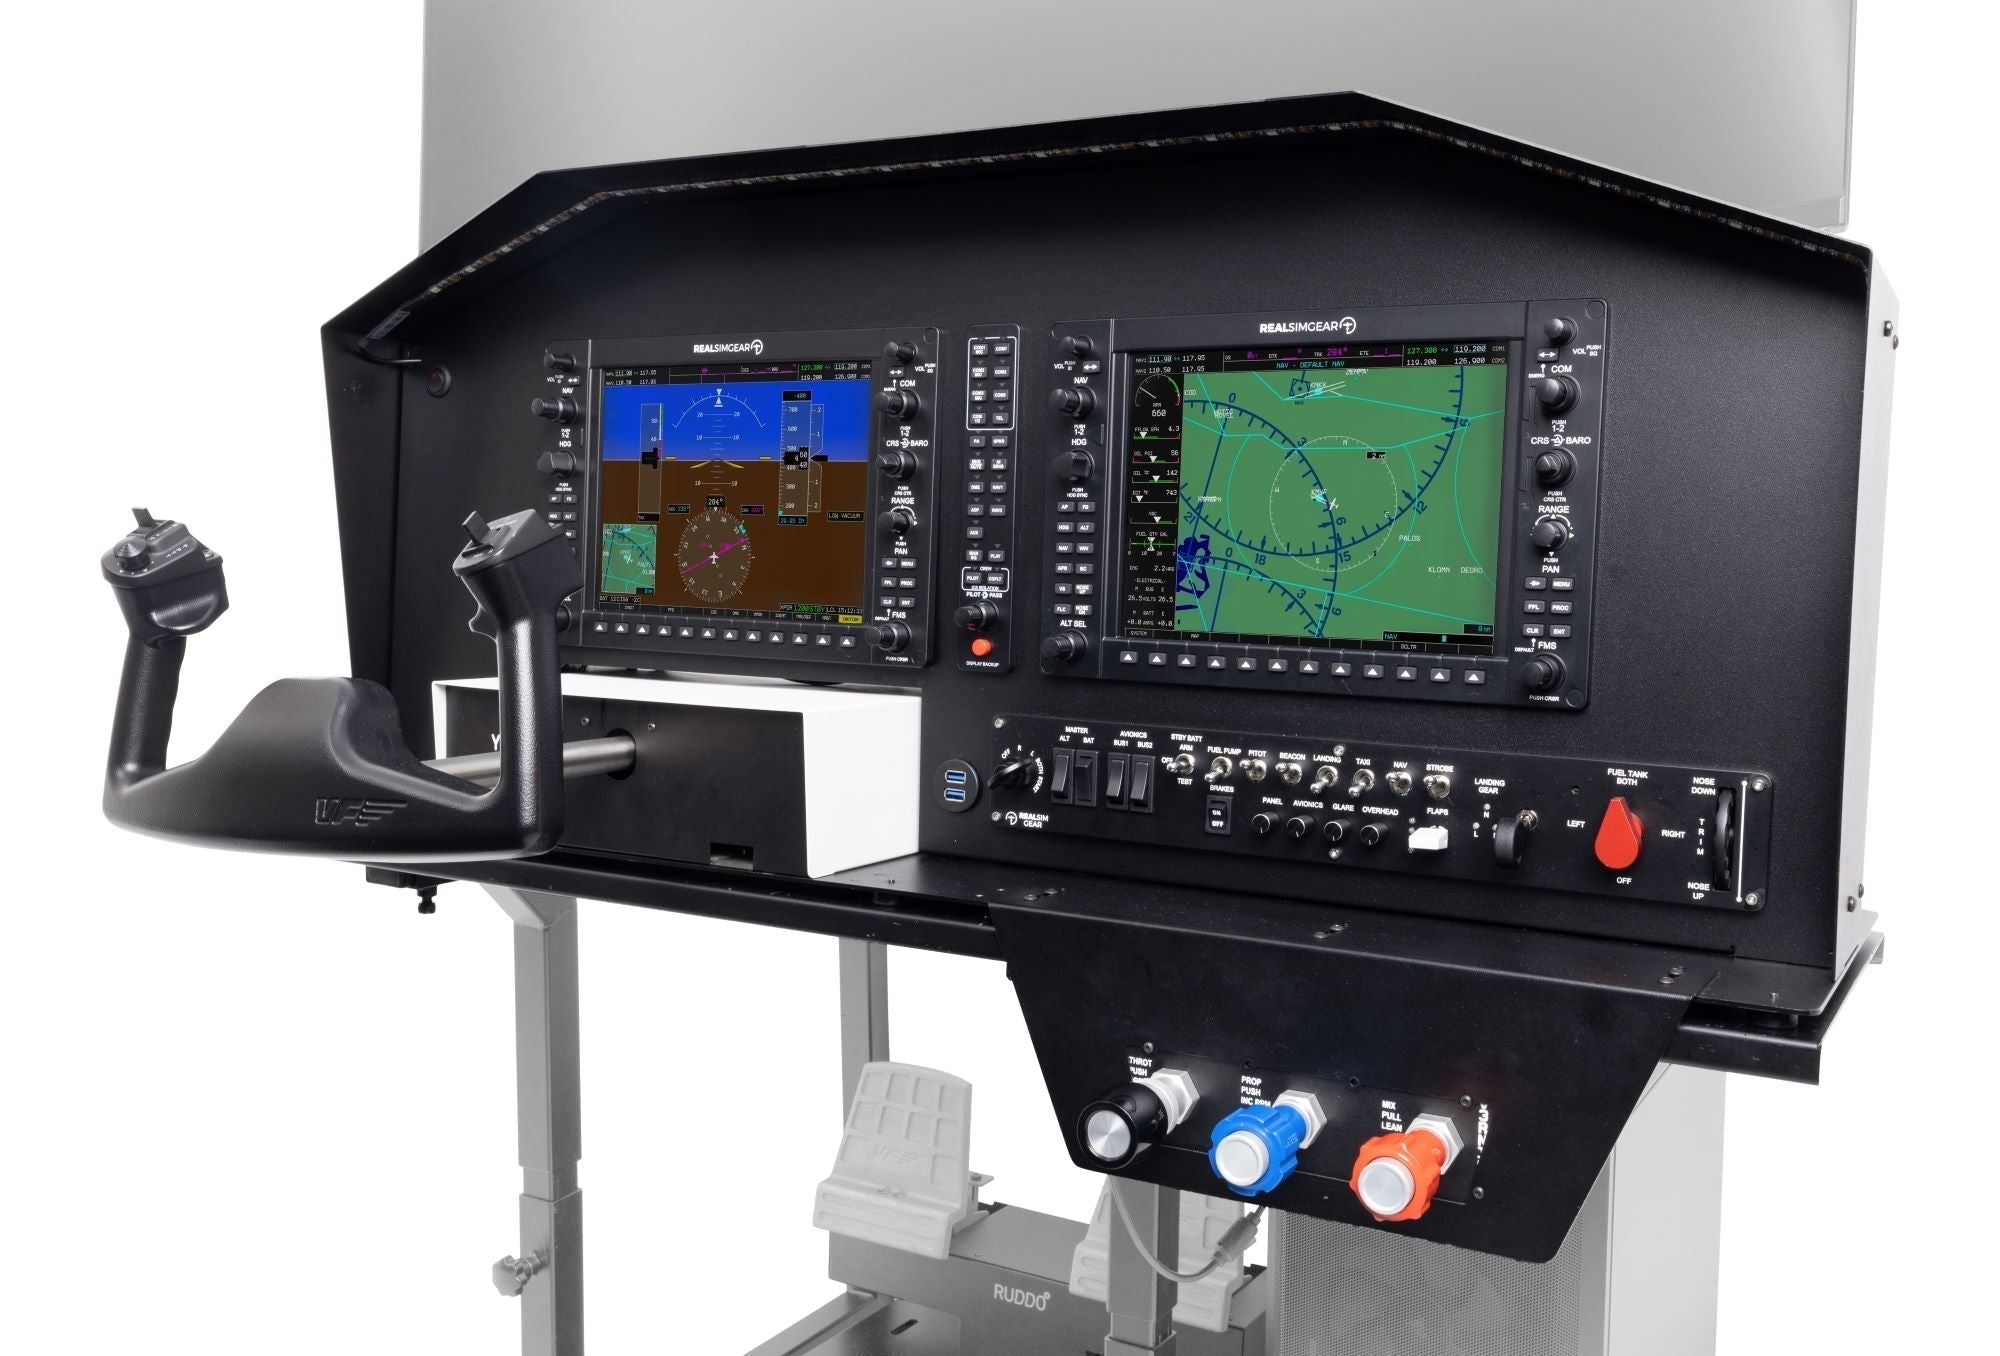
A cockpit based around a glass-panel general aviation aircraft will not need the same controls as a generic multi-aircraft entertainment build. Products such as the RSG G1000 Package make sense when the buyer wants a focused avionics and cockpit direction. A product such as the RSG Cirrus Cockpit makes sense when the experience should feel closer to a specific cockpit style.
A flexible enthusiast setup can use more generic controls, but a training-minded setup should be more consistent. Switching aircraft types every session can be fun, but it can also reduce procedural clarity. If the user is practicing real-world flows, the cockpit should support repeatability rather than novelty.
Controls matter more than decorative realism
The most useful cockpit is not always the one with the most visual detail. It is the one where the controls are in the right place and the user can build habits. Yoke or stick, throttle quadrant, rudder pedals, trim, switches, autopilot controls and avionics interaction all influence whether the simulator feels coherent.
Good control placement reduces mental friction. If the user has to hunt for every input, the simulator becomes a game interface rather than a cockpit environment. If the core controls are placed naturally, the user can focus on procedures, scanning and decision-making.
Displays: outside view, instruments and field of view
A flight cockpit usually has two visual jobs: show the outside world and show the instruments. Some builds use a single large display. Others use multiple monitors, instrument panels or dedicated avionics screens. The right route depends on aircraft style, room width and whether the user is practicing cockpit flow or flying for immersion.
For training-minded use, instrument readability is critical. For scenic or enthusiast use, the outside view may matter more. A premium setup should balance both. The pilot should not have to lean, squint or break posture to see essential information.
Room planning for a flight cockpit
Flight simulators can be easier to place than golf bays and less physically aggressive than racing motion rigs, but they still need planning. Seat access, pedal travel, yoke depth, monitor distance, cable routing, PC ventilation and desk height all matter. A cockpit that technically fits can still feel cramped if the user cannot enter, exit or reach controls comfortably.
Measure the seated reach zone. Where will the yoke or stick sit? Can rudder pedals move freely? Can the user reach switches without pulling away from the seat? Where does the PC live? If the simulator will be used by more than one person, how quickly can the seat and pedals adjust?
Why aviation demand makes simulator planning more relevant
Aviation training demand continues to be a major industry topic. Boeing’s long-term outlook points to ongoing need for pilots and aviation technicians, and market researchers continue to identify simulator training as a growth area. That does not mean every home cockpit is a training device, but it does explain why more buyers are treating flight simulation as a serious planning category.
For ElitePlay, the opportunity is to help buyers understand the difference between an enjoyable cockpit, a procedural practice tool and a commercial training-adjacent project. Each can be valuable, but they should be sold and configured differently.
When to choose a custom flight build
Choose a custom route when the cockpit has a specific aircraft target, a commercial use case, a multi-screen layout, unusual room dimensions or a training-adjacent goal. The more the setup needs to mirror a workflow, the more useful Custom Builds and Installation becomes.
A simple enthusiast setup can start from a product or category page. A premium cockpit should be planned as a room. The difference is not only price. It is the amount of confidence the buyer needs before ordering.
How to use this guide before buying
Use this article as a planning tool before you compare individual products. The most useful next step is to write down the room size, the user type, the main goal and the budget range. That information will tell you whether to shop a listed product, browse a collection, use Find My Simulator, or send a more detailed request through Contact.
The best simulator purchase usually has a clear order of decisions. First, confirm the room. Second, choose the discipline and experience level. Third, decide whether the setup should be permanent, semi-permanent or flexible. Fourth, check the hardware path against future upgrades. That order prevents the common mistake of buying the exciting component first and then discovering that the room, frame, screen or workflow cannot support it.
If this is a normal home purchase, start from Flight Simulators and compare the options against the room. If the project includes installation, commercial use, unusual dimensions, multiple simulator types or a premium finish, it is usually better to start from Custom Builds and Installation so the build can be treated as a complete environment.
Questions to answer before requesting a recommendation
- What exact space is available, including width, depth and ceiling height?
- Who will use the simulator most often, and how experienced are they?
- Does the setup need to be moved, shared or reset between users?
- Which part of the experience matters most: realism, training value, entertainment, speed of setup or visual impact?
- What equipment is already owned, and what must be included from day one?
- Is there a future upgrade path for motion, better controls, stronger screens, software or commercial operation?
- Will the simulator be self-installed, installed with help, or planned as a full custom project?
A practical comparison method
When two options both look good, stop comparing every specification equally. Rank the criteria that will change the experience. A racing buyer may rank cockpit rigidity and pedal position above maximum torque. A flight buyer may rank control layout and visual field above decorative cockpit detail. A golf buyer may rank measurement reliability and room fit above the flashiest software feature. A commercial buyer may rank reset speed and durability above the most advanced single-user configuration.
Price should also be compared as a system cost. A lower-priced product can become the more expensive route if it forces a later rebuild, needs extra mounting hardware, or cannot grow into the intended setup. A higher-priced package can be better value when it removes uncertainty and gets the buyer closer to the finished simulator. ElitePlay’s strongest product paths are the ones that make the total setup easier to understand, not just the product page easier to read.
When to stop researching
Research is useful until it starts repeating the same uncertainty. If the buyer keeps asking whether the room will fit, whether the components work together, whether the setup should be turnkey or custom, or whether an upgrade can happen later, that is the point where a guided recommendation is more valuable than another browser tab. Simulator builds are too room-specific for every answer to come from generic comparisons.
The simplest message to send is: room dimensions, photos, main goal, budget range, products under consideration and any must-have features. With that context, ElitePlay can point the buyer toward Flight Simulators, a specific product, or a custom quote route.
Budget planning: spend where the user will feel it
The cleanest budget is not always the lowest hardware total. It is the budget that puts money into the parts the user will notice every session. For this topic, that usually means prioritizing the foundation, measurement, controls, screen plan, installation fit and upgrade path before adding decorative extras. A setup can look premium in photos and still feel frustrating if the core experience is not stable, clear or easy to start.
Think of the purchase in layers. The first layer is the room: space, ceiling height, power, lighting, cable routes and access. The second layer is the experience hardware: cockpit, enclosure, monitor, projector, controls or motion depending on the discipline. The third layer is the software and operating routine. The fourth layer is future expansion. When a buyer understands those layers, the price conversation becomes more useful because every dollar has a job.
For many ElitePlay customers, the right path is not to buy everything possible on day one. It is to buy a strong first version that does not block the second version. A racing customer may start with a rigid cockpit and direct-drive-friendly frame before motion. A flight customer may start with the right control layout before adding a larger visual system. A golf customer may start with the correct launch monitor and enclosure geometry before upgrading the room finish. A commercial customer may start with fewer bays that are easier to operate before adding capacity.
Installation and setup realities
Installation should be considered before checkout, especially when the simulator involves heavy frames, large screens, motion platforms, projectors, commercial bays or multiple users. The question is not only whether the product can be assembled. It is whether the final setup will be clean enough to use often. Cable paths, PC location, power access, ventilation, screen alignment and walking space all affect the daily experience.
A buyer planning self-installation should confirm the delivery route, tools, available help and setup time. A buyer planning a premium room should think about the finished space: how the simulator looks when not in use, how easy it is to clean, whether guests can understand it, and whether the hardware feels intentionally placed. Commercial buyers should go further and plan staff access, customer instructions, reset time, maintenance checks and what happens if one component needs support.
This is why Custom Builds and Installation matters even for shoppers who begin on a product page. The more the simulator has to fit a specific room or business workflow, the more valuable a planned recommendation becomes. A strong quote is not only a price. It is a way to remove unknowns before the equipment arrives.
How this article should connect to the rest of the store
Use this guide as one step in a buying path rather than a final isolated answer. If the buyer is still deciding what kind of simulator they need, start with Find My Simulator. If the discipline is already clear, move into the most relevant collection and compare product routes there. If the room is unusual, the budget is high, or the project needs installation support, use the contact or custom-build route before narrowing to a single product.
The internal links are there to keep the buyer moving without forcing them into a dead end. A guide should help someone understand the decision, then take the next step naturally. For this article, the main next step is Explore flight simulators. From there, the buyer can compare specific products, send details, or ask ElitePlay to turn the requirements into a more complete recommendation.
Red flags that mean the buyer needs help
- The room dimensions are close to the minimum and there is no clear access space.
- The buyer is comparing premium products but has not chosen a screen, cockpit, enclosure or control layout.
- Several people will use the simulator and adjustment speed has not been considered.
- The setup may become commercial later, but the first purchase is being planned like a single-user home build.
- The buyer wants future motion, better displays, a stronger launch monitor or a second simulator bay but has not checked compatibility.
- The product looks right online, but delivery route, ceiling height, power or mounting are still unknown.
- The budget is fixed, but the must-have outcome has not been named.
Any of those red flags should slow the buying decision in a useful way. They do not mean the project is wrong. They mean the recommendation needs more context. A quick conversation can prevent a mismatch and usually makes the final choice easier for the customer.
What a strong final decision looks like
A strong final decision can be explained in one or two sentences. For example: this setup fits the room, gives the main user the experience they want, leaves a realistic upgrade path and does not create avoidable installation problems. If the buyer cannot explain the decision that simply, there may still be too many open variables.
The aim is confidence. The buyer should know why this route makes sense, what it includes, what it does not include, and what can be upgraded later. That clarity is what turns a simulator from an exciting purchase into a long-term part of the home, training space or business.
Final review before checkout or quote request
Before the buyer commits, it is worth doing one final review in plain language. Confirm the product or package, the room it will live in, the main reason it is being bought, and the first upgrade that might happen later. Then check whether every part of the route supports that plan. If any answer feels vague, pause and ask for guidance rather than trying to force the purchase through.
This final review is especially useful for premium simulator projects because the biggest risks are rarely hidden in the product title. They are hidden in fit, workflow, expectations and future compatibility. A few extra minutes spent checking those details can prevent a buyer from choosing a product that is technically strong but not right for the way the simulator will actually be used.
Next step
Browse Explore flight simulators, use Find My Simulator for a guided route, or send the room details through Contact if the project needs help before buying.
Sources and 2026 market context
This guide was written in June 2026 and uses current market signals, simulator-buying research and ElitePlay product routes.